Update 2020-07-31
The article below discusses a 10-year old version of Quartus and how to configure JTAG on Linux versions before systemctl. Some references from the original article like the Altera Wiki are no longer available. Therefore the links have been cleaned up.
I recently got an FPGA-on-a-USB-stick as a Christmas present: an Altera/Arrow BeMicro SDK. Fun to play with and ideal to refresh my hardware design skills… I thought… Immediately I was confronted again with how much work it is to set up all necessary hardware design tools.
The system requirements state that you need Windows, but fortunately I got it working on Linux (Fedora release 13 (Goddard)). Installing Altera Quartus and Nios II went flawlessly. Finding out how to get JTAG with the USB blaster to work was a bit harder.
Install Altera tools
The Altera Quartus 10.1 installation was slow because of the huge 6GB download but it finished without issues; no special tricks that were required for earlier versions.
If your Linux machine has SE Linux enabled, run:
sudo chcon -t textrel_shlib_t /opt/altera/10.1/quartus/linux/*.so
USB-Blaster setup
Setting the USB-blaster was a bit harder:
As described on the Altera website, you need to create an extra udev rule (sudo vim /etc/udev/rules.d/51-usbblaster.rules) with following content:
# USB-Blaster
BUS=="usb", SYSFS{idVendor}=="09fb", SYSFS{idProduct}=="6001", MODE="0666", PROGRAM="/bin/sh -c 'K=%k; K=$${K#usbdev}; printf /proc/bus/usb/%%03i/%%03i$${K%%%%.*} $${K#*.}'", RUN+="/bin/chmod 0666 %c"
You can load this new rule by running sudo udevadm control --reload-rules
JTAG daemon configuration
Based on the description on the Altera Wiki, I created two configuration files:
sudo mkdir /etc/jtagd
sudo cp /opt/altera/10.1/quartus/linux/pgm_parts.txt
/etc/jtagd/jtagd.pgm_parts
touch ~/.jtag.conf
Next, I appended following lines to my to my /etc/rc.local file:
echo 356 40000 32 32000 > /proc/sys/kernel/sem
/opt/altera/10.1/quartus/bin/jtagd
And I started the jtagd daemon by running rc.local:
sudo /etc/rc.local
Check
You can easily verify that Everything is working with following procedure:
- Plug in your BeMicro SDK stick
- Start Quartus II
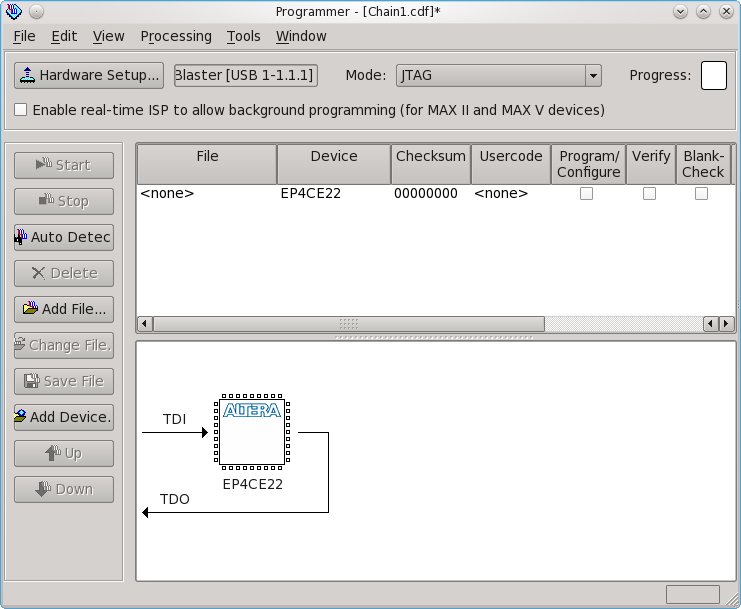
- Select Tools > Programmer
- Click the "Hardware Setup..." button, double click on "USB-Blaster" and click close
- If you now press the "Autodetect" button, two devices should be visible: EP3C25 and EP4CE22 (this is the Altera Cyclone 4 FPGA). If you see those it means that everything is OK.

Run the tutorial
Now you are ready to run the BeMicro SDK tutorial.